American Flag Pie

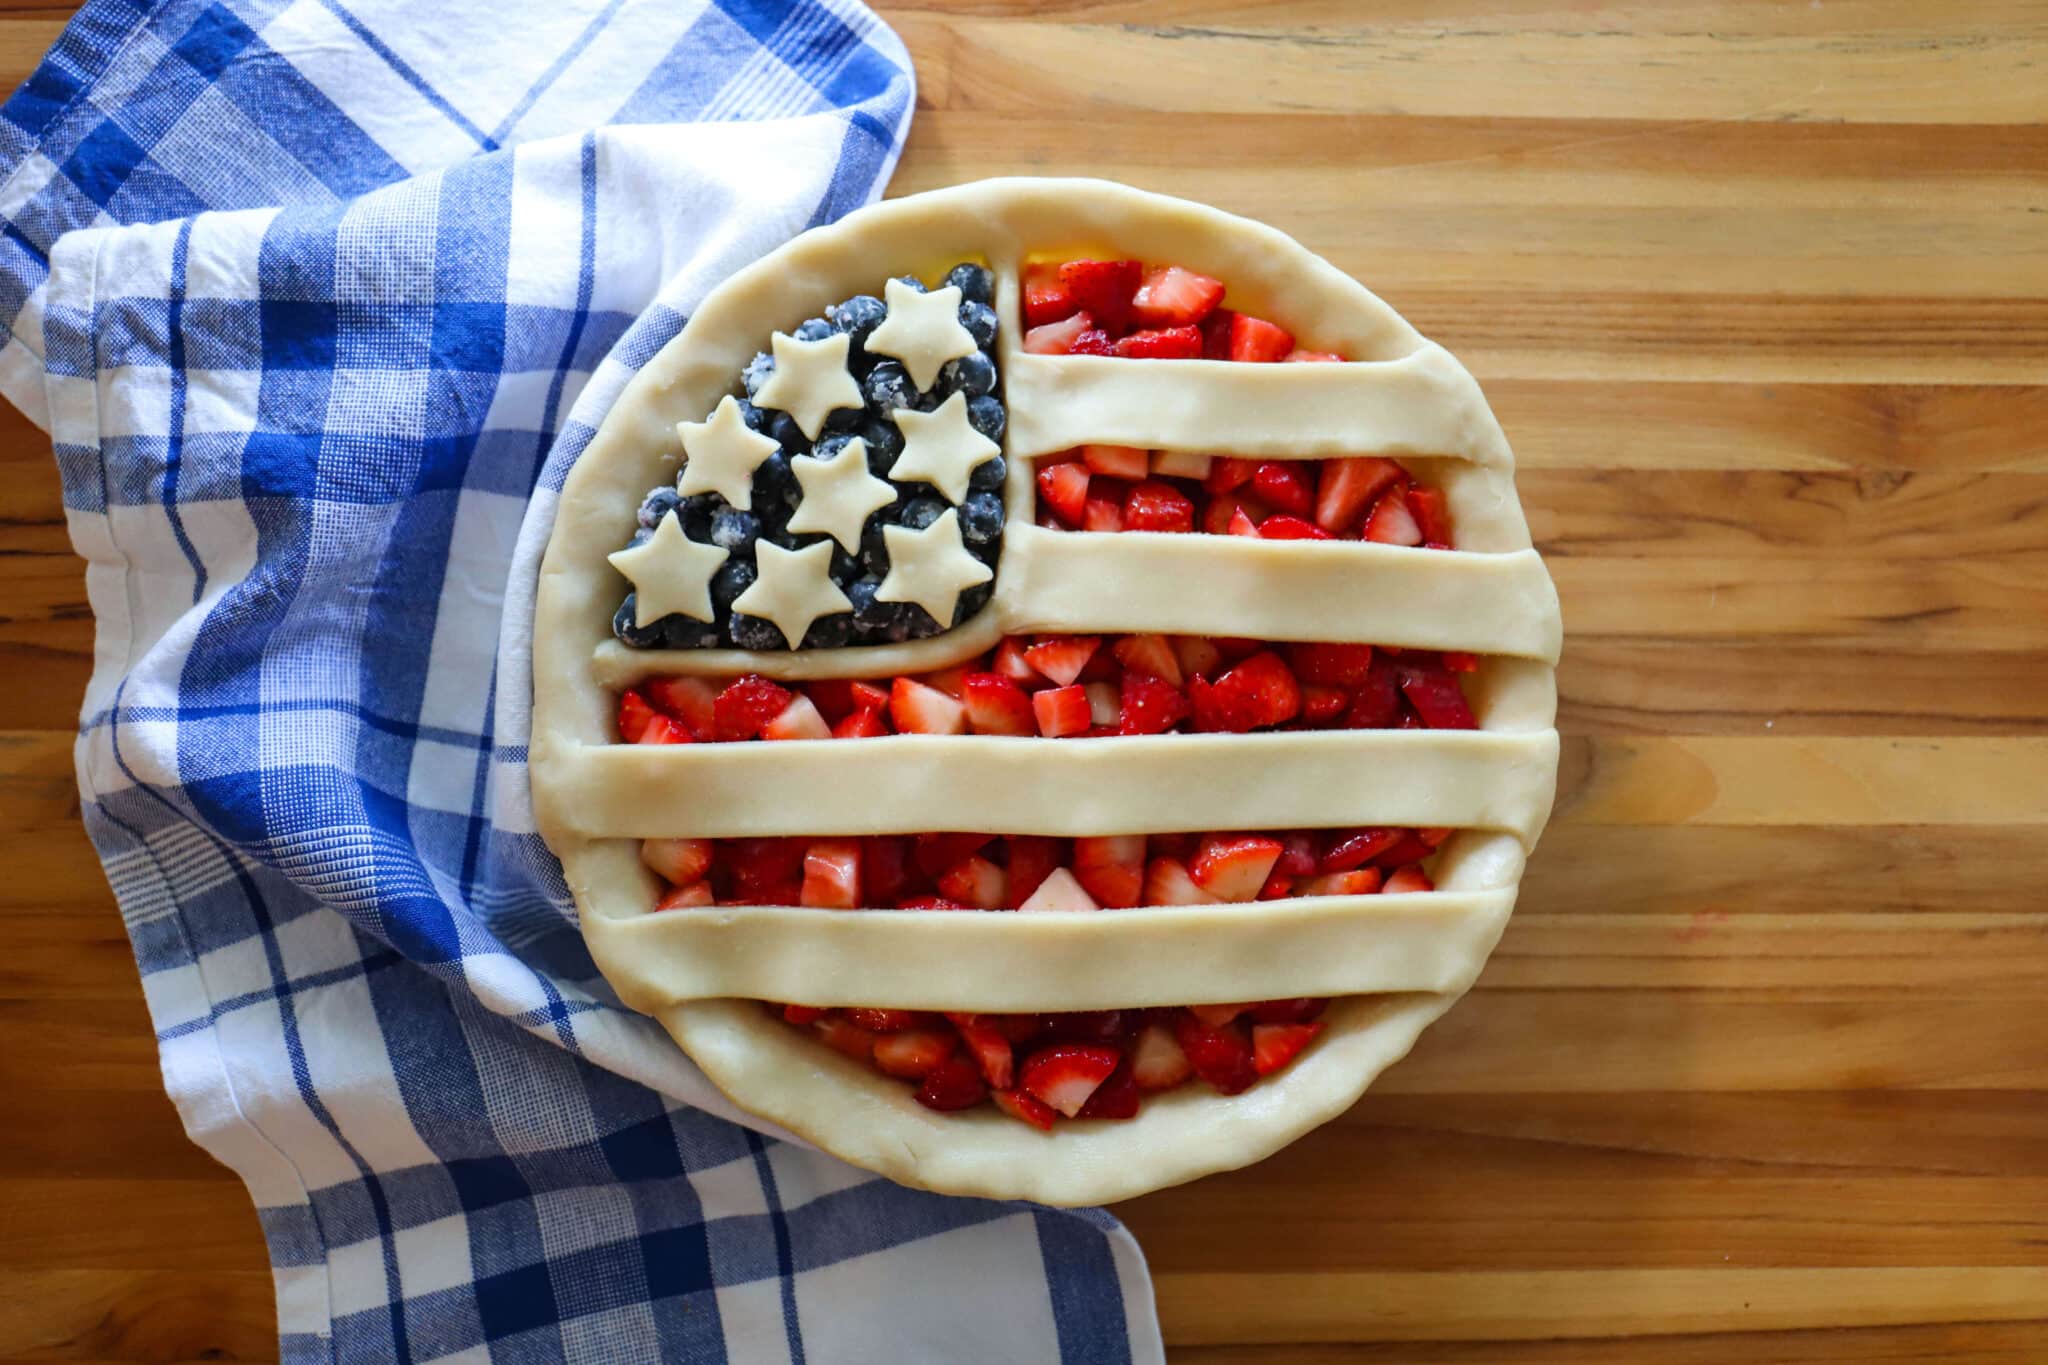
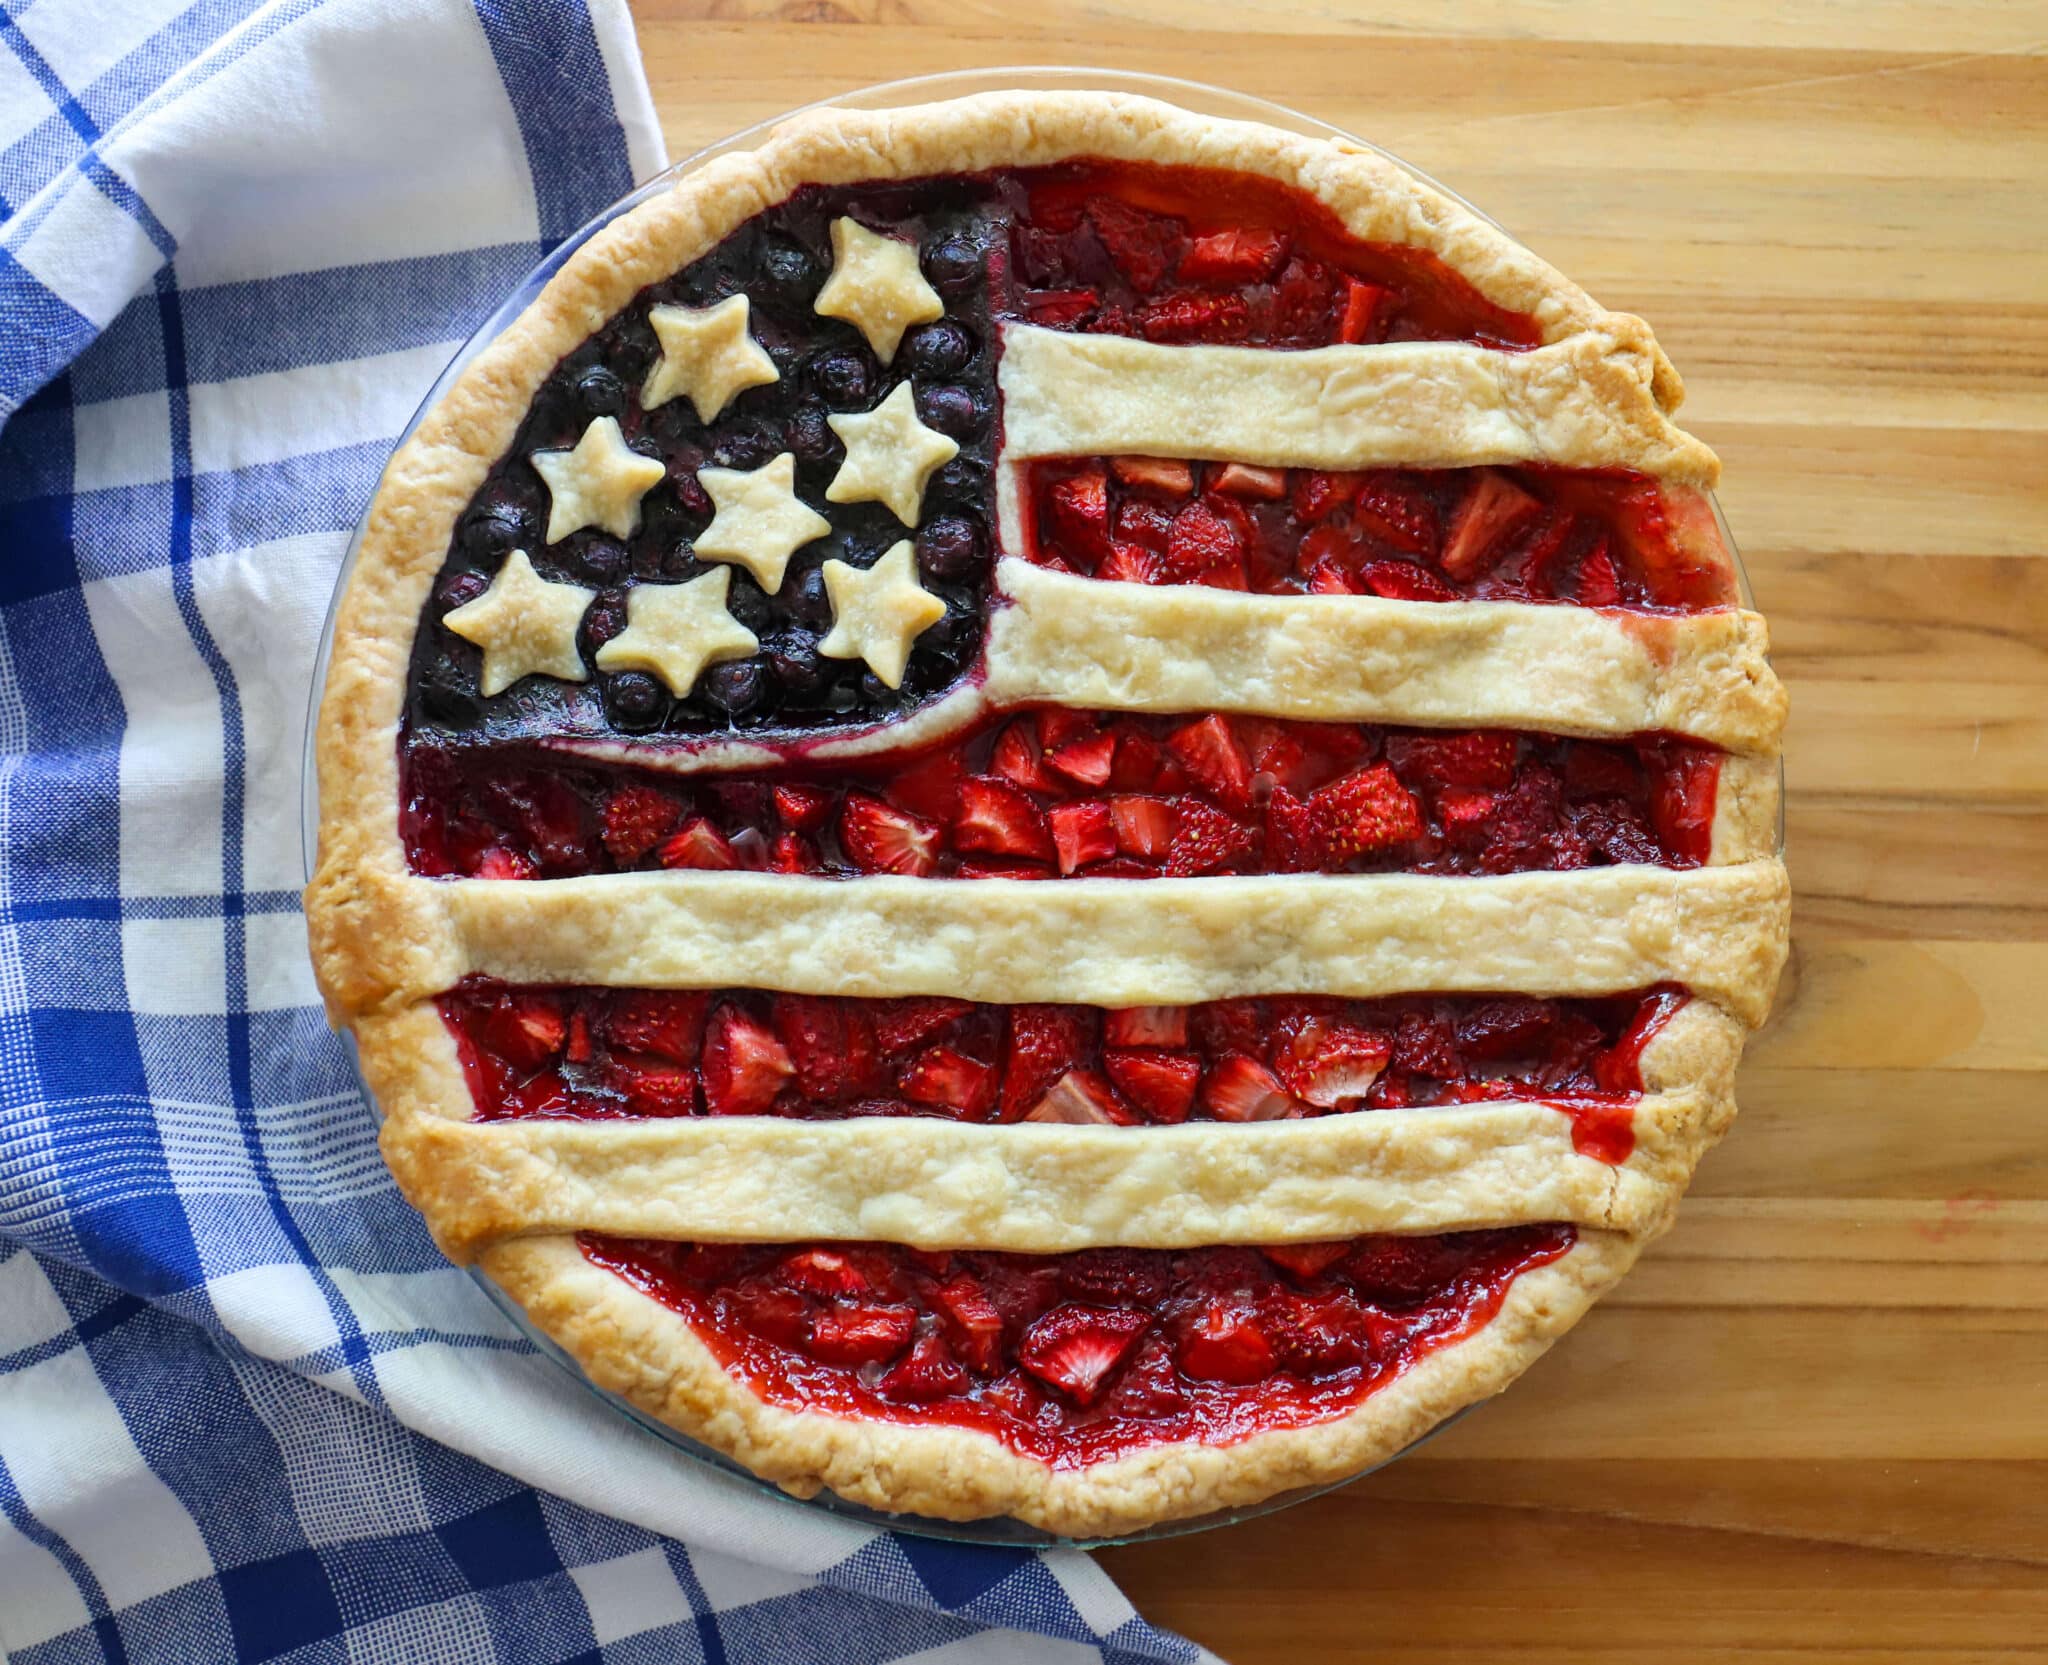
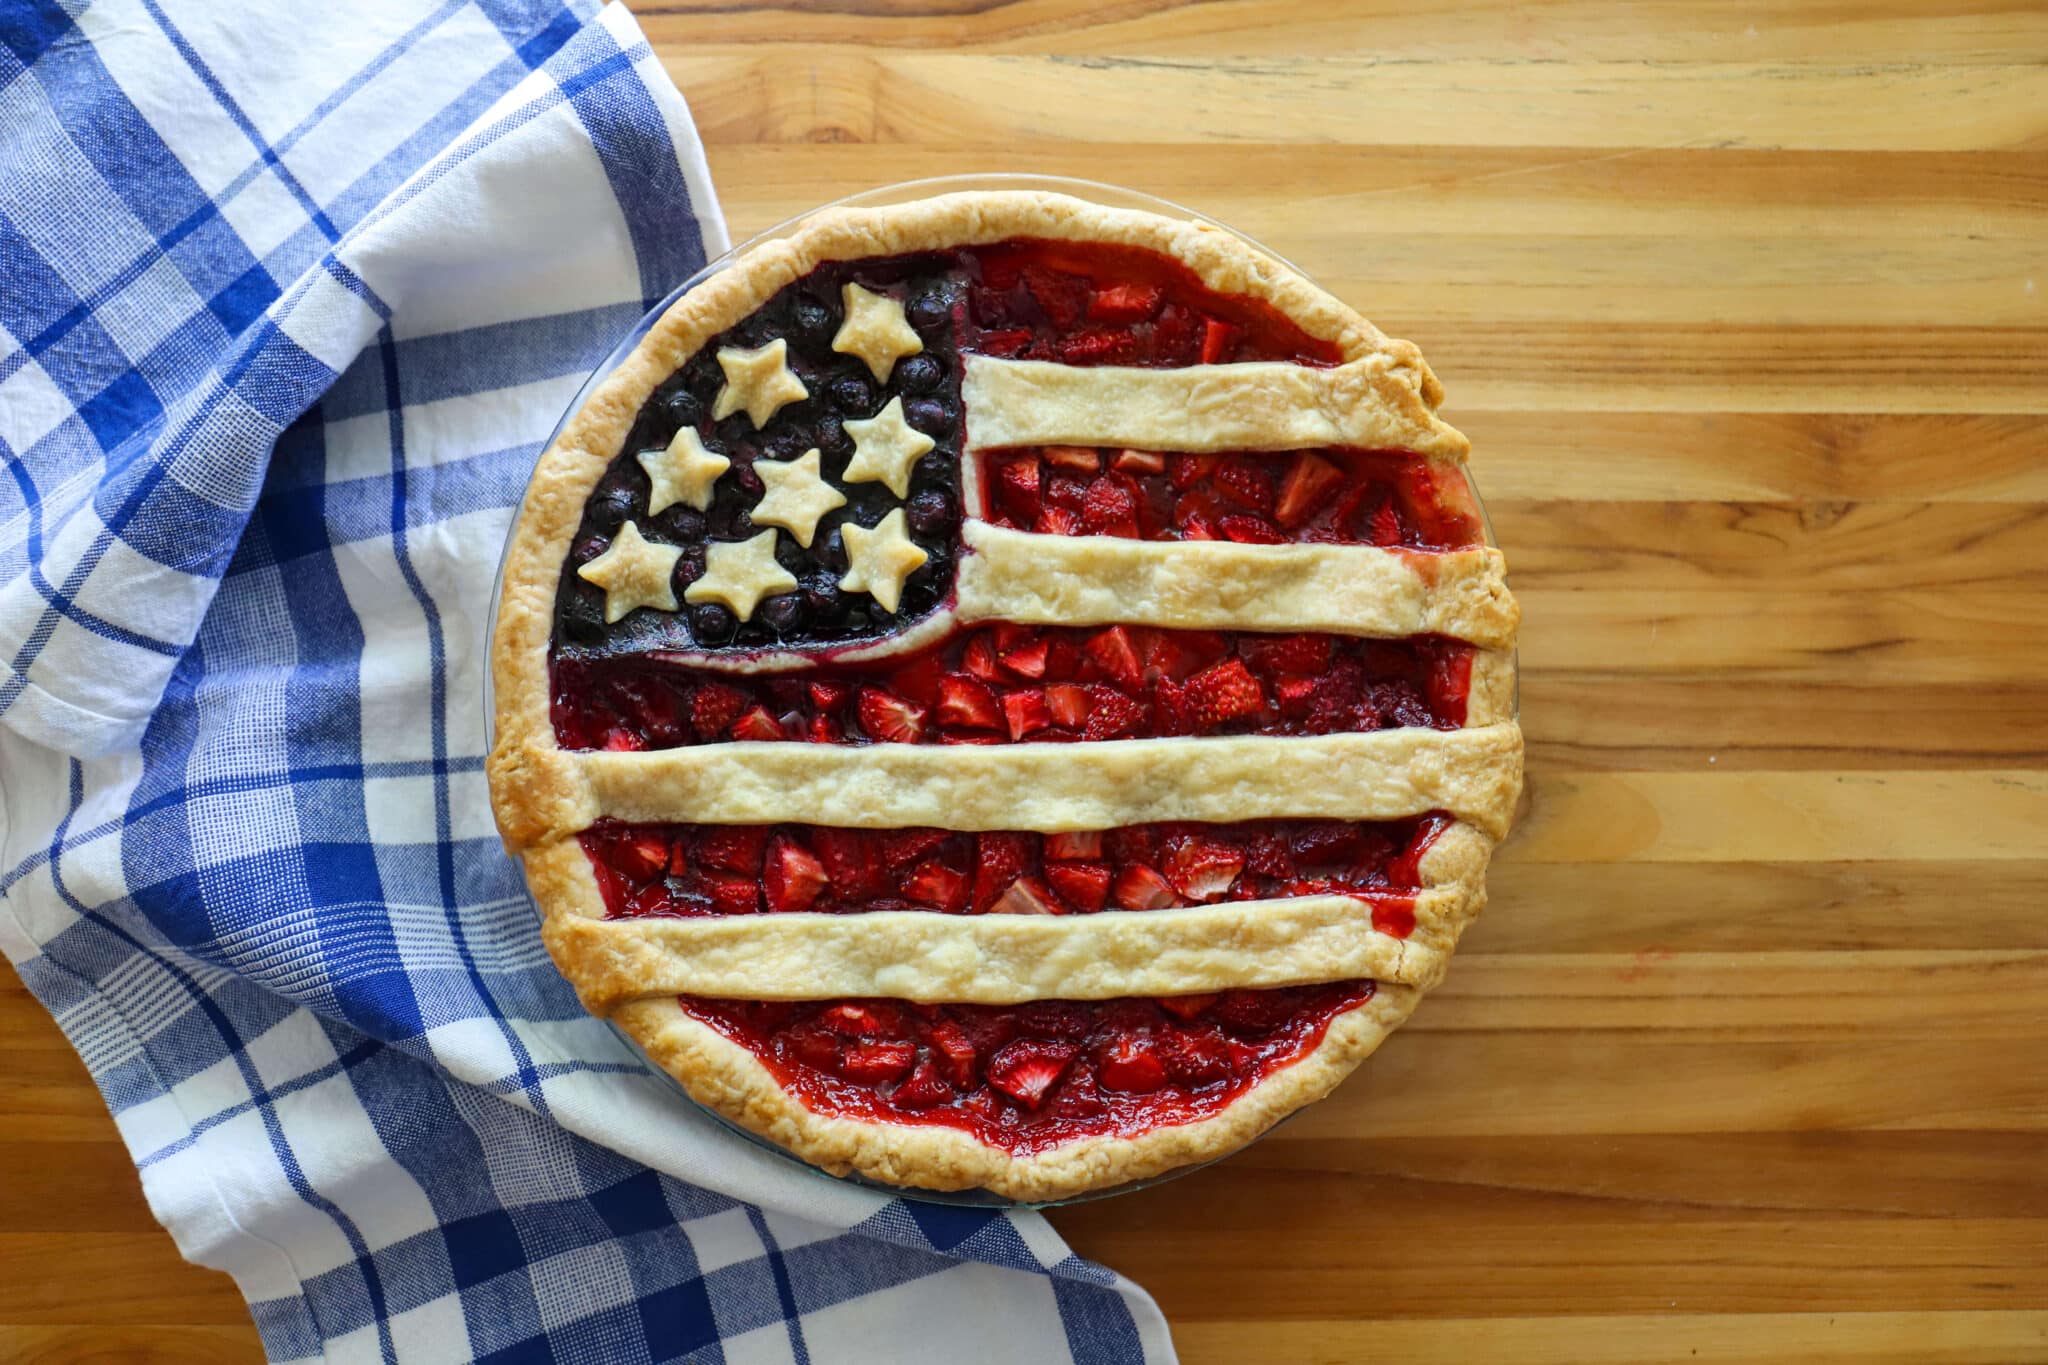
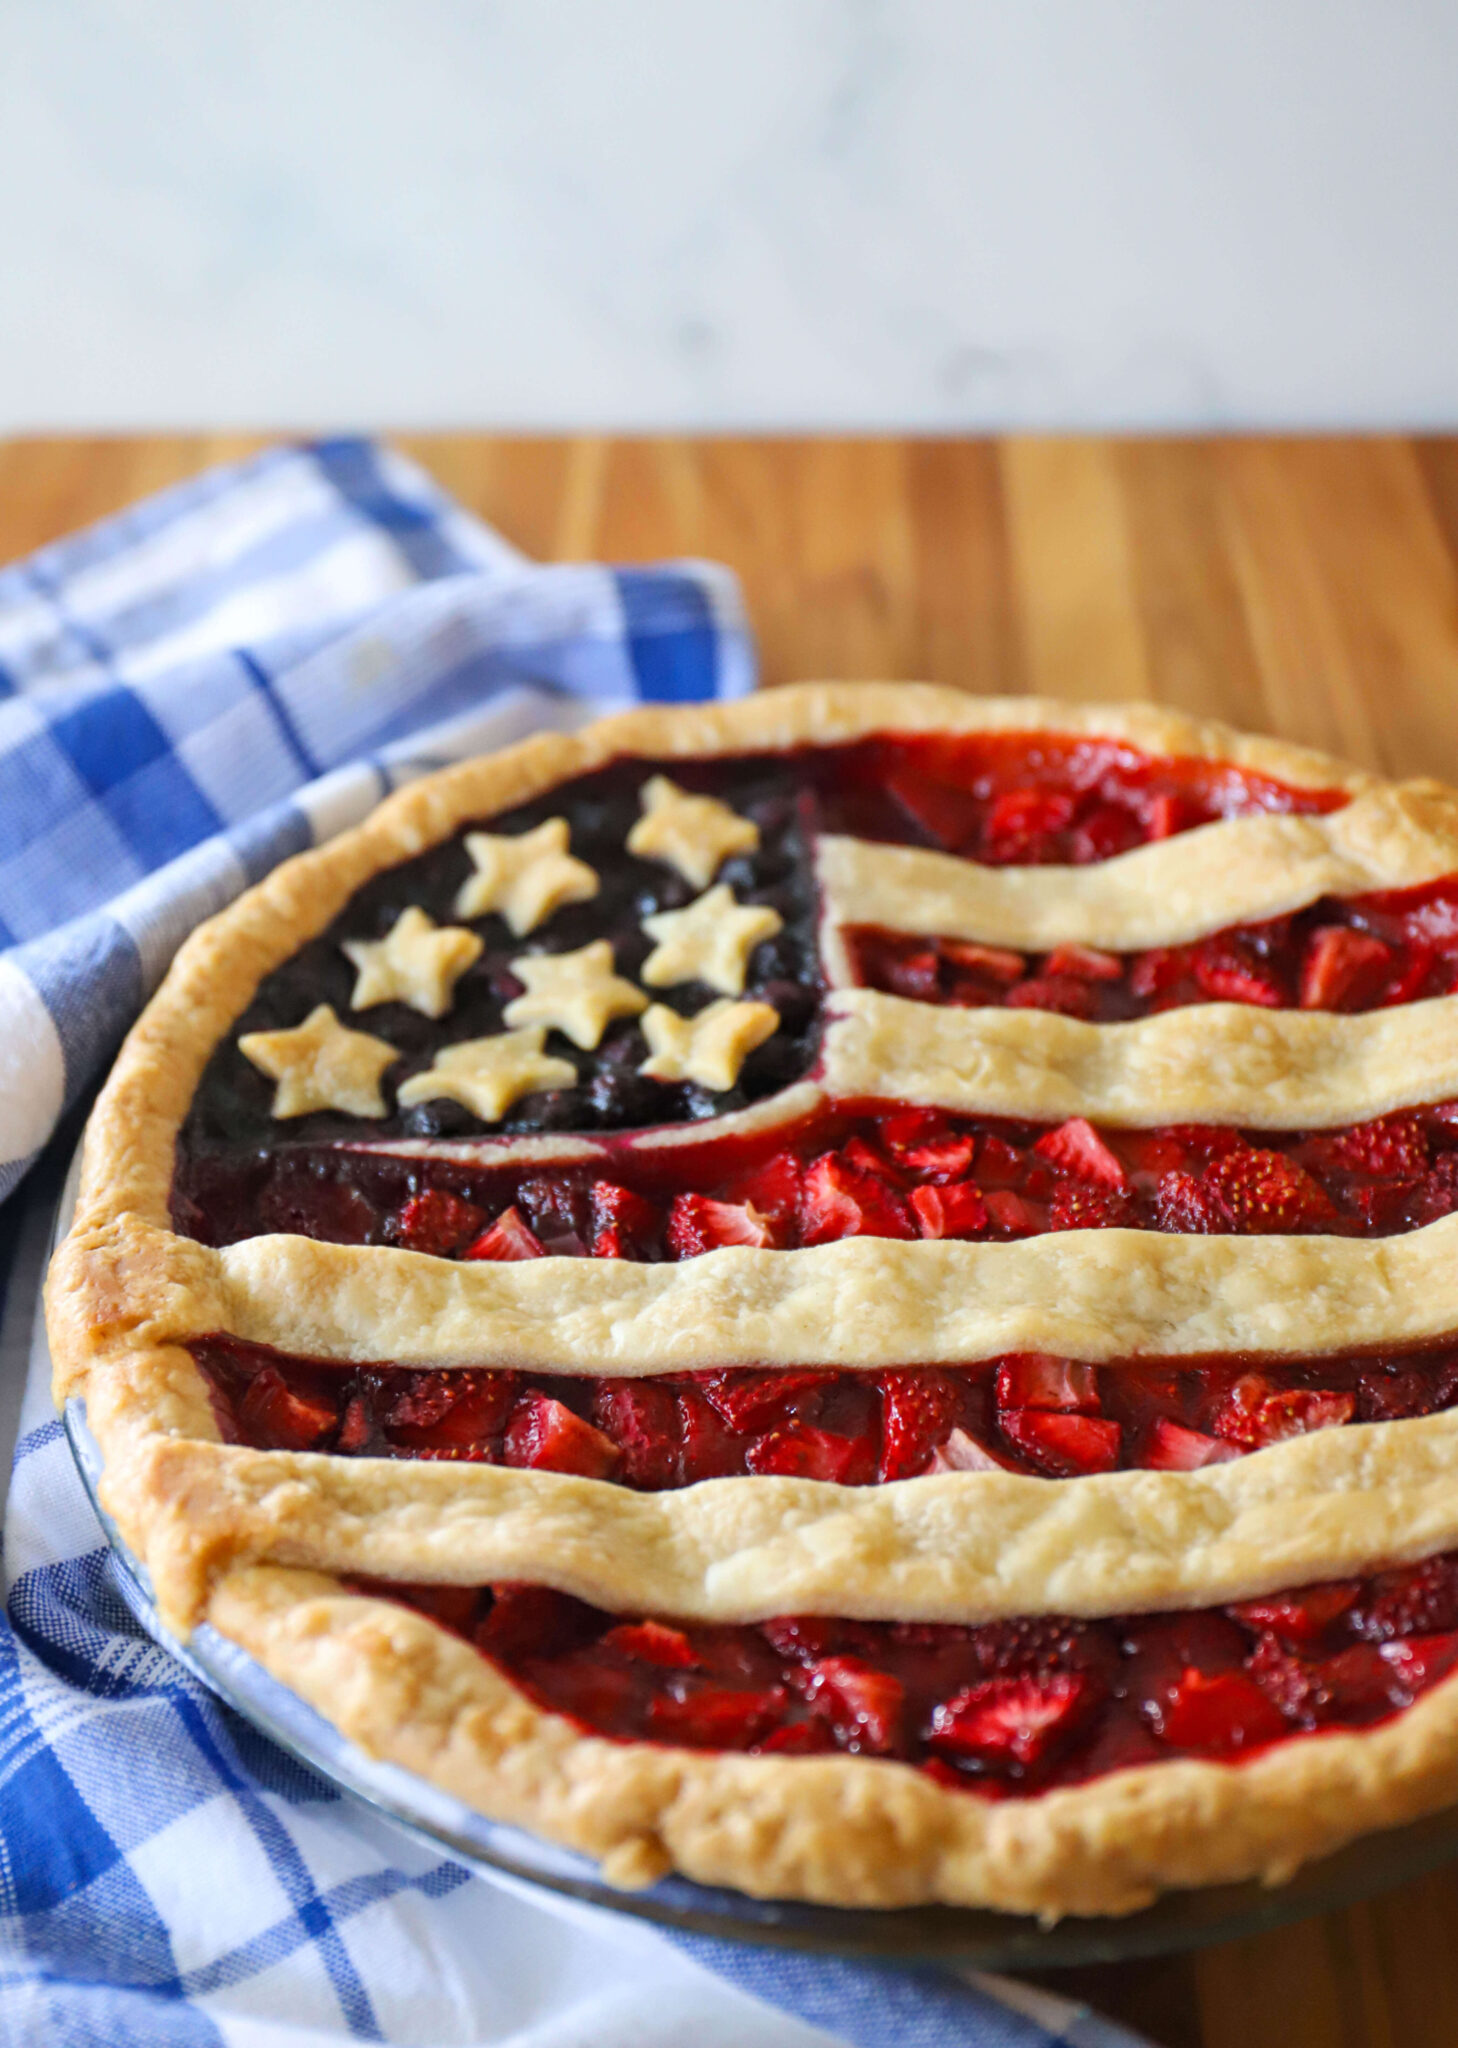
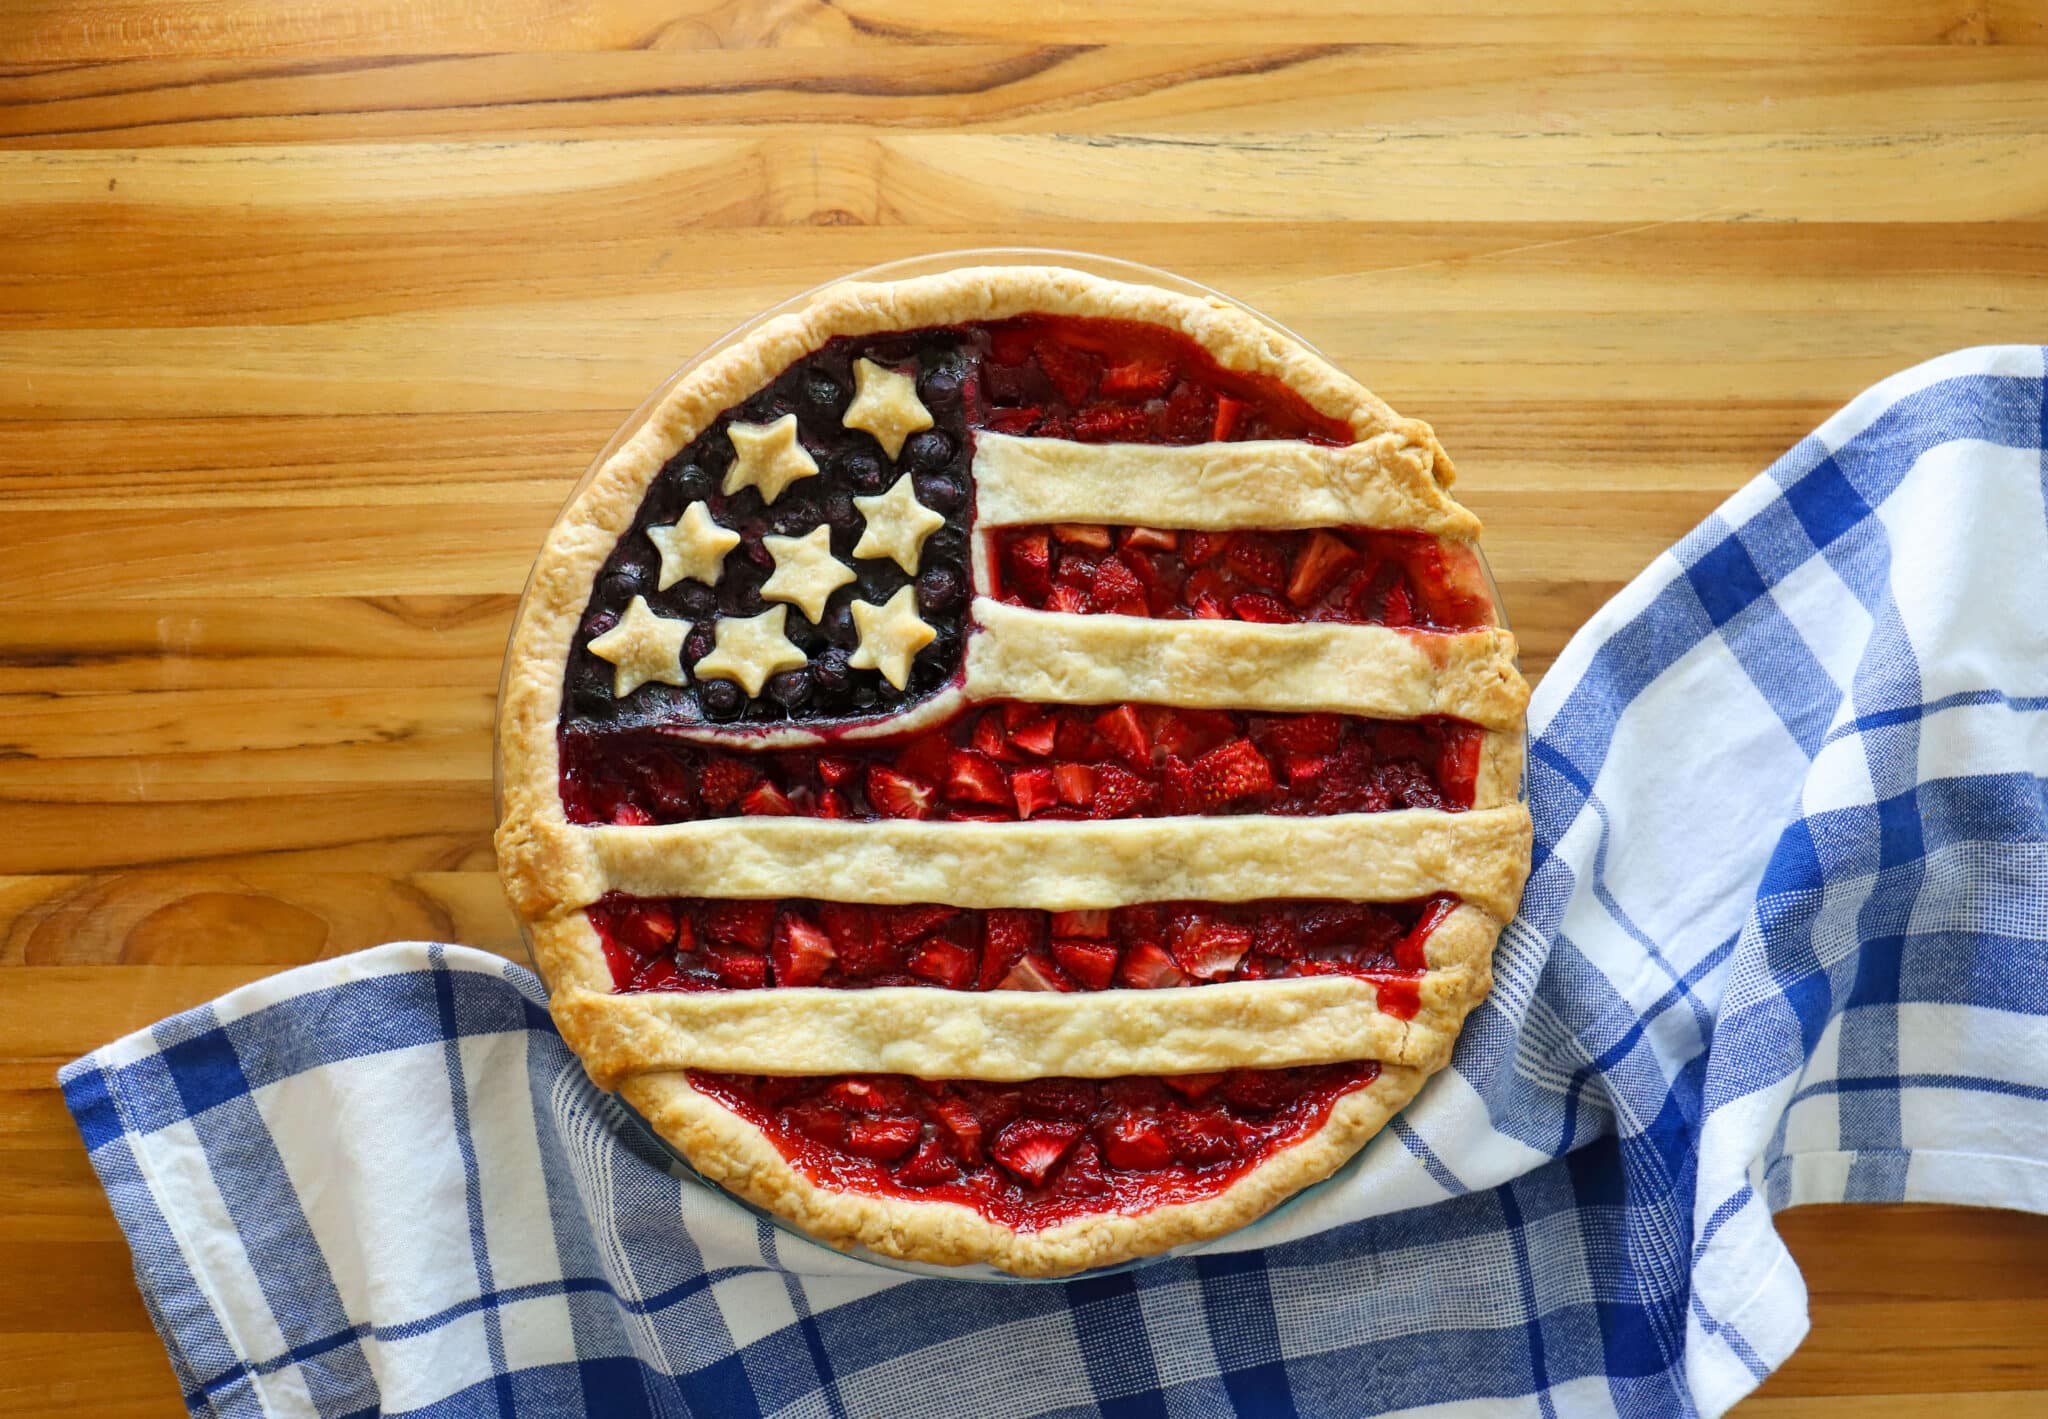
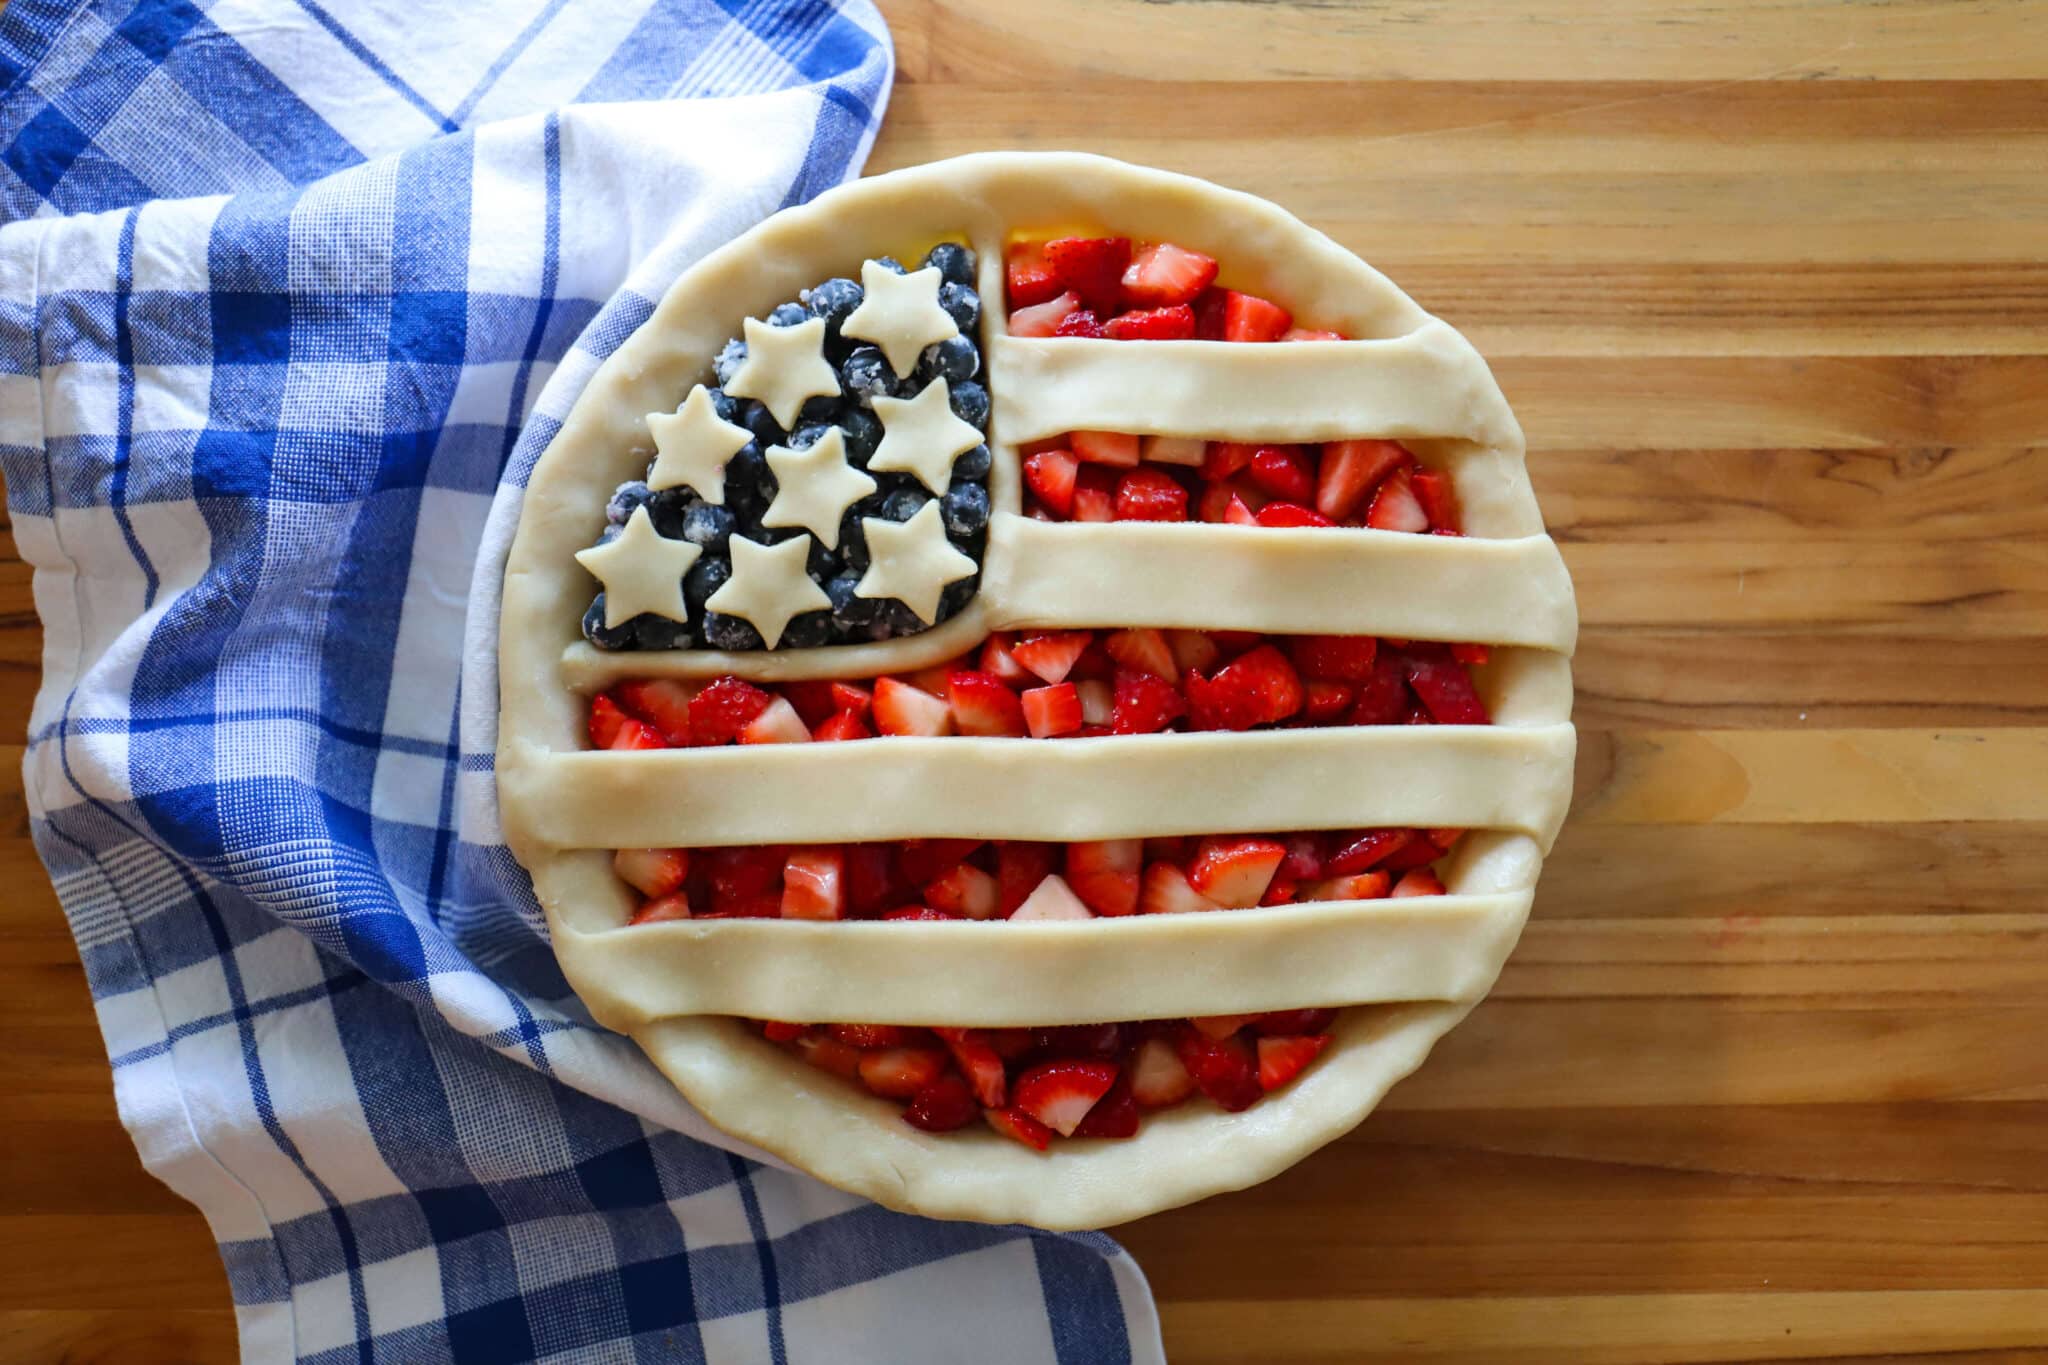
This American Flag Pie is a real show-stopper! With colorful berries, stars and stripes, it is both festive and delicious. A flag pie is a perfect way to celebrate the Fourth of July, Memorial Day weekend, or welcoming home a soldier.

For the pie, you’ll need a 9-inch pie plate, small star-shaped cookie cutter, and either a pizza cutter or lattice cutter or sharp knife.

When making berry pies, you need to use a good thickener. I use cornstarch, but minute tapioca works too. Whichever you use, make sure the filling comes to a boil. The boil activates the thickener, ensuring that it does its job. So right before you take the pie out of the oven, look for bubbles. As long as you see those, the thickening process is happening.

To boost the flavor and texture of the cooked strawberries, I use seedless strawberry or raspberry jam. Raspberry jam has a tart, punchy flavor and bold red color. Strawberry jam is sweeter than raspberry, so go with strawberry if you prefer less pucker! Either way, the jam adds depth and interest that will make you crave another bite!

Hope you enjoy this American Flag Pie! As always, if you have questions along the way, just send me an email and I’ll be happy to help.

American Flag Pie

Ingredients

For Crust:

  • 1 pie crust, fitted into a 9″ pie plate
  • 1 pie crust, rolled into a 12″ circle


For Strawberry Filling:

  • 1/3 cup (105 g) seedless strawberry or raspberry jam
  • 3 Tablespoons (22 g) cornstarch
  • 1/2 teaspoon (2 g) Kosher Salt
  • 1 tsp (4 g) vanilla extract
  • 1 1/4 lbs. strawberries, stemmed and quartered
  • 1/4 cup (56 g) sugar


For Blueberry Filling:

  • 1 cup blueberries (150 g)
  • 1/2 Tablespoon (6 g) cornstarch
  • 1 Tablespoon (12 g) sugar
  • Pinch of salt


For serving: vanilla ice cream, whipped cream

Instructions

  1. In a medium bowl, whisk together 1/3 cup strawberry or raspberry jam, 3 Tablespoons cornstarch, 1/2 teaspoon Kosher salt, and 1 teaspoon vanilla until smooth. Set aside.
  2. In a small bowl, toss blueberries with 1/2 Tablespoon cornstarch, 1 Tablespoon sugar, and a pinch of salt. Set aside.
  3. Using the pie crust rolled into a 12″ inch circle, cut out 8-10 stars and 5-6 long strips. Using some of the extra dough, form a strip of dough about 7.25 inches long and 1.25 inches wide. Use the strip of dough to form a corner in the top left side of the pie plate. Use a little bit of water to “glue” the strip to the crust. Place pie plate with crust in the freezer. Place the stars and stripes on a parchment lined baking sheet and refrigerate.
  4. Preheat oven to 415 F (212 C). Line a baking sheet with parchment paper.
  5. In a large bowl, toss strawberries with 1/4 cup sugar. Let sit 10 minutes. Add jam mixture to strawberries and toss gently until all strawberries are coated.
  6. Remove pie crust from freezer. Pour blueberry mixture into corner of crust. Blueberries should reach the top edge of the corner piece. Pour strawberry mixture into crust. Press berries down with a spatula. Add stars on top of blueberries. Place stripes horizontally across the pie over the strawberries. Trim the stripes to fit the pie plate. Use your fingers and a little water to seal the stripes to the outer crust. Place pie on lined baking sheet.
  7. Bake pie at 415 F (212 C) for 20 minutes. Rotate baking sheet, add a crust shield to protect the crust from burning if needed, and reduce heat to 375 F (190 C). Continue baking for 45-50 minutes, or until filling is bubbling and top is golden brown. (The filling MUST be bubbling before you take the pie out of the oven. Keep adding 5 minutes to the cook time until you see bubbles in the fruit filling.)
  8. Cool 4 hours before serving. Serve with ice cream or whipped cream, if desired.


Notes:

Make-Ahead Tip: The strawberries can be prepped in advance. Quartered strawberries can be stored in a bowl, covered with plastic wrap, in the refrigerator for up to 24 hours.

Make-Ahead Tip: The crust can be fitted into the pie crust in advance. Double wrap in plastic and freeze for up to 1 month. Do not thaw before using.

Make-Ahead Tip: The stars and stripes can be cut out in advance. Place on parchment-lined baking sheet, cover with plastic wrap, and freeze for up to 1 month. Do not thaw before using.

*I use affiliate links for my favorite products. If you click and purchase, I may receive a small commission at no extra cost to you. Thanks so much for helping me keep this website up and running!

Share With A Friend

Welcome!

Hi! I’m Marie. Mama, wife, homebody. I’m a self-taught chef and cookbook author. 

I love sharing fast, fresh, family-friendly recipes that will, hopefully, make your life a little easier.

Above all, I love spending time in the kitchen with family and friends. Come join us!

Contact

Watch & Cook With Me!

Leave a Reply

Your email address will not be published. Required fields are marked *

Marie Saba

From My Kitchen To Yours